1. IntroductionWe have prepared for you a ready-made
OpenATV 7.2 firmware with
Oscam iCam v9 installed and configured for
Zgemma H11S (ARM cpu)Attention! After installing the firmware, all data on your receiver will be deleted! Including your scanned channels, etc. Therefore, before installing, we strongly recommend that you make a full backup of your receiver!After installing the firmware, you will need to make some settings – if necessary, change the configuration of your tuner, as well as specify your data for connecting to the CS server.
If you don’t have a Zgemma H11S receiver, please use other article!2. Firmware installation on Zgemma H11S- Format your USB stick with a FAT32 file system
- Download the USB image from HERE
- Extract the USB image (it is a .zip archive) on your PC using your favorite unzip tool to the root directory of your USB stick. The result is that you get a openatv-7.2-zgemmah11s-icamv9-20230222.zip and force_h11.txt file.
- Ensure no other USB devices are plugged into the receiver while flashing
- Insert the USB stick containing the image files into one of the USB ports on the receiver, rear USB port is advised if possible.
- When you enter the recovery menu then it will force to install the image from local USB stick. On OpenATV firmware you should go to Menu -> Setup -> Software Management -> Flash Online and choose Backup image openatv-7.2-zgemmah11s-icamv9-20230222.zip from the USB stick
- Before restoring please choose Clean (just flash and start clean) option.
- After flashing receiver will be rebooted.
- Remove the USB stick
- Now you can start to configure the receiver. Instructions are below (Go to step 3)
3. Setting up the receiver after flashing3.1 Tuner ConfigurationIf, after flashing and turning on the receiver, the “
kabel eins” channel did not work for you, then you need to change the tuner settings. To do this, go to the
MENU -> Setup -> Reception -> Tuner Configuration section and configure your tuner.
 3.2 Obtaining the IP address of the receiver
By default, the receiver should obtain a network address automatically (DHCP). To find out, you need to go to the section
MENU -> Information -> Network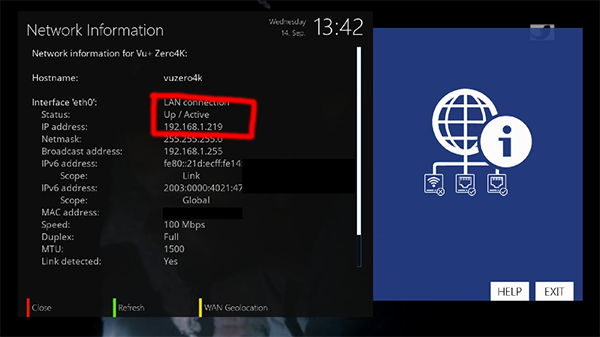
Connection status must be
Up / Active, IP address must be defined (In my case it is 192.168.1.219)
If for some reason your receiver did not receive an address automatically, then you need to set up the network manually. This can be done in the section
MENU -> Setup -> System -> Network -> Device Settings -> Adapter Settings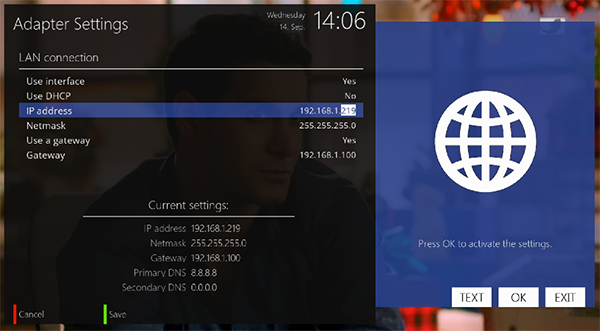 3.3 Setting up the Oscam
You need to add your access parameters to Oscam. To do this, open the Oscam Web Interface in a browser using the IP of your receiver. Oscam Web Interface is located on port 8080. In my case it is:
http://192.168.1.219:8080/You need to go to the
Files -> oscam.server section, specify your connection data taken from the billing and click the
Save button.

Don’t forget to click the
Save button!
4. Reboot the receiverPlease reboot the receiver completely after setup. Do not turn off the receiver from the socket, but reboot it through the menu
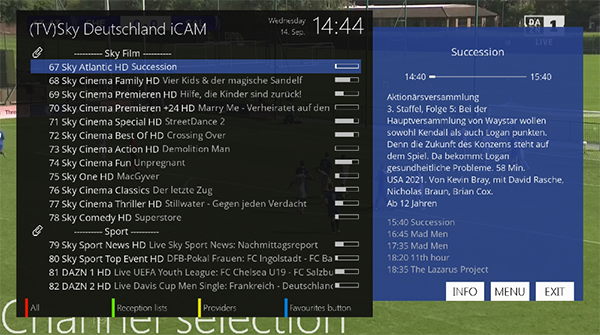
MENU -> Standby / Restart -> Reboot5. Choose a playlist and watch!After rebooting the receiver, you can go to the
Sky Deutschland iCAM bouquet and enjoy watching.
 6. Additional Information
Installed firmware has a root password for remote access via SSH / Telnet:
Login: root
Password: icam2022
We recommend that you change the root password, and restrict or disable remote access if you do not need it.
7. Changing ROOT passwordTo increase the security of your receiver, we strongly recommend that you change the root password.
In order to change the root password, log in to the receiver using SSH or Telnet using the login and password specified in paragraph 6. Enter the command:
passwd rootand set your new password


 Тема: Oscam iCam v9: OpenATV 7.2 image for Zgemma H11S (ARM cpu) (Прочитано 1727 раз)